Showing posts with label adventure. Show all posts

Sunday, 1 February 2026

TSR's module A2, Secret of the Slavers' Stockade (Fort Level)

TSR Module A2: Secret of the Slavers' Stockade

Harold Johnson with Tom Moldvay

At a couple of climactic points in module A1, Slave Pits, the adventurers can find documents that will lead them to the next adventure in the series. Moving away from the chaotic half-ruined town, you find a self-contained fortress in the wilderness, a staging point for the slavers' operations. This stockade is bounded by four intact walls, less of a ruin than the Highport temple. But inside, it's a fixer-upper, with ungoverned areas that continue the theme of the unruly stronghold. The troops are mainly goblins and hobgoblins, not orcs and half-orcs. Two independent bosses with powerful assistants run the place, one in the fort above ground, and two in the dungeons. 

Like A1, A2 was originally run as two parallel tournament adventures, with the above- and below-ground levels as the respective settings. The module's maps shade in the paths of each tournament version. It''s not hard to see how the requirements of each one-track, twisty gauntlet got in the way of realistic defensive architecture. However, even in the limited tournament mode, the fort level threatens the kind of barracks-clearing pitched battle I mentioned in the opening essay as a catastrophic failure for a fort infiltration. As always, full spoilers ensue.

Greyhawk Musings: Thoughts on A2 Secret of the Slavers Stockade
Sure, go ahead, spoil one new monster on the front cover ...

FORT LEVEL: MOATHOUSE

The tournament starts with an easy if improbable way in. Just like in A1, an escaped slave, "Lady Morwin Elissar," shows you the route of her escape - an open window in the outer wall of the moathouse, with a convenient rope left dangling. This device is more interesting because the slave is an NPC who might go with you but is kind of unreliable. Still, it is only the first instance of a repetitive tendency that crops up throughout the module.

This moathouse is one of three buildings on the flat hill where the stockade sits, all held together with outside walls. It's also, you guessed it, an unruly stronghold. Garrisoned by a couple of hobgoblin squads, half of one floor is home to a haunt - more of a Victorian-story ghost than an undead monster. It's the haunting that keeps the troops scared of this area, justifying the lack of attention paid by the garrison. The challenge with this entity must have felt fresh at the time. But by now, dealing with a ghost's past-life obsession and present-day possession is part of 5th edition, and quite a few supplements have extended the Gothic notion into an adventure genre (link, link, link).

In this unruly zone, we are introduced to an unfortunate theme: the defender love silly traps. Here, they have acquired some fancy glassware and alchemy to blind intruders and trip them up with hundreds of glass marbles underfoot. Arguably, these traps sit at the outer limit of plausibility, but worse is to come.

One good point of the writing throughout this module shows up here. As in Albie Fiore's early White Dwarf adventure "The Lichway," each bivouac of troops throughout the fort has some kind of action ongoing, be it eating, gambling, or less wholesome sport. I've described this approach before as the "diorama encounter," but it seems to be a priority of the Johnson/Moldvay authorial team that gives welcome flavor. 


FORT LEVEL: GATEHOUSE

The next building along the railroad is a gatehouse on the far side of a courtyard where a wild anhkheg will pop out of a patch of mud and attack. Why do the defenders allow a powerful monster to sit athwart the only line of communication from moathouse to gatehouse (the walls connecting them have no walkway)? Here's the greed for variety, any fight that's not with hobgoblins, at the expense of naturalism. Other hard-to-believe premises: the fight can go on without the guards on the walls noticing, until the monster lets out a dying screech; and in fighting, the party will become so caked with mud that they suffer a -2 to hit until they can wash it off in a fountain some way down the railroad.

The gatehouse itself was only developed for campaign play. Its inner buildings are more hobgoblin guardposts and barracks, again with diorama activities going on. Beyond the gate that the anhkheg guards, there is another courtyard, which the players can gauntlet-run or sneak across, while guards patrol the walls above. A couple of patrols come with another new monster, an oil-sweating Gollum-like wretch known as a boggle, whom we see on the front cover. Here there's little opportunity to use the boggles' weird abilities. They are just being led around as sniffer dogs, bringing to mind another Tolkien character, the orc tracker Snaga of Isengard. Then on to the keep's courtyard garden where carnivorous apes and hobgoblin archers jump the party. A dead end -- unless they can open the locked door that leads into the keep proper.

FORT LEVEL: MAIN KEEP

The position of this building in the hill fort is beyond absurd. The ramparts have no connection to its interior, even though that's where many of the troops and leaders make their home. What's more, the ramparts loom over the keep - the better to shoot at the roof, allegedly -- but vision to the outside world is blocked by tall palisades cut through with infrequent arrow slits. It's as if the fort is prepared for an infiltration, more so than an attack; but even that goal is bungled in the execution, so that a dungeon-crawling party can take on one group of enemies at a time. For example, if the players make it to the courtyard, there's no line of sight to the fight there from archers on the walls, only to the roof.

The interior layout is also absurd and not remedied in the campaign version. A single path spirals around, kinking up a few times, before ending up in the central room where the main leaders and troops are found. Cut a single door to break the spiral, and the leaders would have easy access to the entrance and be able to reinforce the defense. But where's the fun in that, compared to dungeon crawling?

Worse yet, the dungeon crawl is fixed up with tricks and traps worthy of a Scooby Doo haunted house. You have the stuffed bear rolling down a ramp to frighten you backwards into a pit. Then the hobgoblin ambush where some of the troops dress as mummies and run at an angled mirror so you'll waste spells and missiles on their reflections. Not just silly, these traps make no sense placed across the only route of reinforcement in an active stronghold.

Off the tournament track, there is another haunted area shunned by the soldiers. But this ghost is just a set of gimmicky manifestations engineered by the escaped slave who lives in the rafters. All these hijinks aside, the final encounter area has a memorable leader in Icar. He's a fire-loving blind warrior who fights with super-senses, taking after Daredevil or Zatoichi. Some of the diorama encounters in the central area are likewise good, and there's a new monster, the cloaker, whose hypnotic droning works as an opiate of the masses for the enslaved. In the boss area, whose defense the module illustrates with an innovative (at the time) tactical map, are a couple of ways down to the dungeons.

...and on the back cover, another new monster to spoil

Can we fix the fort? Maybe, but extensive changes to the map would have to be made. And then the module becomes something different. Raising the alarm no longer causes a temporary pressure situation before the party can scoot on to the next isolated area. It activates the whole beehive of the garrison, acting all together in a mass of close to 100 hobgoblins and powerful leaders, and certain to overpower the mid-level party it is rated for.

Next: The dungeon level

Friday, 12 April 2024

Night's Dark Terror 14: Funny Things Happen on the Way to the Horse Market

This is part of a series of posts with a scene-by-scene critique, appreciation, and improvement of the 1986 TSR module B10, Night's Dark Terror

After Xitaqa, the players are finally released from the chain of time-sensitive adventures leading to the rescue of Stephan Sukiskyn. It's up to you how much breathing room they get, to go on some of the side adventures mentioned earlier. But logically, the Sukiskyn family would be very eager to get their 24 white horses sold before too much time passes. Nor would they be at all happy to see the adventurers, still bound by their agreement with Stephan, march off to raid some goblin lair or haunted tomb, never to return. 

CC Public Domain 1.0 image from PickPik

The power to resist the family's pressure lies in the hands of the players, but they also have a powerful lure to make the journey. For there's easy money in it without any obvious hazards -- 50% of the sale price, if they succeeded in returning Stephan alive, and even after the recovery of his dead body they'll probably be cut in for 25%. But is the journey to the market site, the elven trading post of Rifllian, uneventful? Of course not! There are four keyed encounters along the way. All of these, in one way or another, expose the party to the ongoing plots of the Iron Ring.

1. Ambush at Misha's ferry. After the possibility of an uneventful but sentimental last encounter with Misha's bear, there's an Iron Ring attack set up at this crossing point, with a force almost identical to the very first encounter on the river.

Let's imagine what's going through the minds of these shadowy overlords as they try to put an end to your ever-so-inconvenient heroes. The river attack failed, but they can blame it on the added forces of Kalanos, his men, and the walls of the riverboat. The siege of Sukiskyn failed, but there was the whole combat-ready family in addition, and again, fortifications. It just about makes sense that the baddies would think a force totalling 13 hit dice (in Basic D&D) would have a chance against the party, alone (but for Stephan and Taras) and in the open. But by now the total party levels should number 12-18, plus 8 levels in Stephan and Taras.

This ambush should be easily winnable by the heroes. If its failure becomes known to HQ, by survivors reporting back, or by the dead being discovered, the Iron Ring as an intelligent organization should know that a bigger force is going to be needed to take the good guys down. Mostly, this logic is followed in the rest of the adventure, but never to its ultimate conclusion. Maybe that's just standard Bond-villain procedure applied to the fiction of adventure gaming. To strike from complete surprise, with numbers that cannot be defeated, would be profoundly unfair to the players.

2. Raid the Iron Ring camp. On the trail across the moors to the gnomes' ferry, the party runs into Loshad one more time, who tells them of an Iron Ring slaving camp in the hills. Attacking it would satisfy both Loshad's goals (free mistreated horses) and the party's (free mistreated people). This encounter is tougher, with 28 hit dice worth of foes, but the party might gain surprise. If you think the odds are too much, you might let the players bargain the were-horse into giving fire support. Loshad, as usual, is written well as an NPC. His pro-horse agenda makes dealing with him more prickly than your usual quest-giver.

In this and the previous encounter, it is possible that the party captures Iron Ring personnel and convinces them to talk. This is not covered in the module, which assumes a strict code of silence among this organization. But in fact, through some impressive persuasion and stagecraft of intimidation, my group succeeded in wresting some limited information out of one captive goon. You may want to have the bad guys hold their tongue no matter what. But as I'll argue below, this policy tends to frustrate the natural motivation to go on the offensive.

3. The gnomes' ferry. There's something amusingly Vancian about the gnomes' ability to sniff out a party's wealth and adjust their prices accordingly, even if the well-traveled Stephan would be in a position to warn the party. In running this place I took the opportunity to flesh out the gnomes a little, as well as introduce some more NPCs to the inn which, as they were more campaign-specific, I won't trouble to detail.

Aino Weaselbane is the leader of the gnomes, an attractive and shrewd silversmith with a nose for gold. She pours ale and cooks meals in the kitchen, and will take the lead in bargaining for passage across the river or any other goods, such as silvered weapons.

Jorma Sawleaf, a bard, plays the hurdy-gurdy in the inn. He will take requests for a tip of 2 gold, and will stop playing entirely for 10, unless outbid by someone who inexplicably appreciates his music.

Pekka Waggletop is an idler, drunk, and pub crank of the first order. If so much as looked at, he will launch into his crazy ideas about slaver conspiracies and evil wizards. By chance, he is right, but only by chance.

Vallo Gimbletooth is the waiter, a retired pit fighter with the scars and broad-bladed shortsword to show for it. Naturally, he also takes the role of security for the inn.

Symphonia, just Symphonia, is a veiled fortune-teller who uses cards for divination.  Her prophecies ("cross my palm with 20 silver") tend to be vague, but one in three is startlingly accurate.

Here, too, there's an encounter with an Iron Ring agent who is smart enough to run from this party, putting them again in the position of initiative as they decide whether to pursue him. Frustratingly, though, there's little to be gained information-wise if they do; thwarting him only slows down the Iron Ring's operation to tail the party a little bit.

4. Meeting with merchants. This encounter just across the river, unlikely to end in combat, introduces two elements to be repeated later on. First, we start introducing one of several temptations to sell part of the white horse herd immediately, rather than hold out for a better deal at Rifllian. Then there's the news -- hardly surprising or worth the asking price -- that Iron Ring agents are specifically searching for the party.

After this last encounter, we end up just a day away from Rifllian, but with a contradiction hanging heavily over the adventure. Night's Dark Terror perfectly illustrates how, in the 1980's, Basic D&D was just one step ahead of its Advanced stable-mate in meeting the need for emotionally engaging adventure stories. Soon afterwards, Dragonlance (with its own, far worse railroading issues) and Ravenloft (better done, for sure) would start to fill that niche for AD&D. But meanwhile, you have the heartbreaking death of Aleena from the Mentzer Basic starter adventure. And in this module, the heartbreaking death of Mish, and after that, all sorts of human woe and destruction visibly served out by the Iron Ring and their goblin stooges. 

So, at this point, red-blooded heroes should be raring to take the battle to the enemy and root out the Iron Ring menace. But the adventure, as written, frustrates that aim. Once more, they're put onto the railroad train by one of the Sukiskyn family -- Stephan, who has no interest in seeking revenge against the conspiracy that kidnapped him, menaced his family, and murdered nearly the whole human population of the upper Volaga River. No, his only thoughts are to follow the family treasure map to that mysterious feature shown in the mountains. 

This contradiction explains why the rest of the adventure, to me, is unsatisfying. Over the next several encounters, the party will be shadowed and sniped at by Iron Ring forces, but is given no lead to take the initiative. My players weren't having it; a successful interrogation at the slavers' camp gave them the bare minimum information that the Iron Ring had a base under Kelven, and they are currently knee-deep in the first module of TSR's renowned A series, which fits the situation perfectly. The gnomes, the merchant, or documents found at the slavers' camp are also good opportunities to lay down clues for a more attack-oriented campaign.

Because of this not-unwelcome derailment, the next entry will be the last in this series for a while. I'm not going to comment on any scene I haven't played through, and Rifllian was the last scene in B10 that the party played through before getting into a more proactive adventure.

Thursday, 4 April 2024

Night's Dark Terror 13: Xitaqa 4, Curse You Golthar!

This is part of a series of posts with a scene-by-scene critique, appreciation, and improvement of the 1986 TSR module B10, Night's Dark Terror

The next deathtrap in Golthar's tower, room X11, is personally run by the evil magic-user himself. It appears to be a dead-end art gallery, but the paintings on the walls have peepholes in them. These allow Golthar to cast spells through them from a hidden passage that surrounds the place. If the adventurers try to remove or attack the paintings, electric traps zap them. Meanwhile, two pink jade statues of Hutaakans animate and attack. 

Clever mappers will already have noticed that the room's dimensions are smaller than the tower's outside, leaving room for additional secret areas. But this is only a convenient ambush point, not Golthar's last stand. At the first sign that the party has found the secret door leading out, he will flee up the stairs to his bedchamber.

Crafting the art gallery, from Battlin' Barrow

The setup is not described precisely, but it's reasonable that, Scooby-Doo style, the peepholes are concealed in the eyes of portraits. The stone wall is ancient and thick, but we can imagine a missing block about the size of a caster's head, so the whole face can fit in. Once a panel with painted eyes is pulled back, the peeper's real eyes can press right up to the holes. Sharp-sighted appreciators of the arts may notice that the eyes of each painting are set a little deeper than the canvas.

The secret door is also not described very well, because this is Old School writing, not Old School Revival. It makes sense that the door is behind a painting, the only one that's not trapped or holed, and that lifting the painting off its peg rotates the door open, while putting it back (or pushing the peg down) snaps the door back. Perhaps, cheekily, the painting can be of a Great Gate in a nearby city.

Golthar's attack moves, in the module-as-written using Basic D&D, are likely to be as follows. 

State of Play: He has already cast detect invisible and so, as a 6th level magic-user, has three level 1, one level 2, and two level 3 spells left. He holds one level 3 slot for Fly, and one level 2 slot for Mirror Image. He has memorized other spells to fit the strategy below.

Pre-battle: Casts shield on himself, to protect against counter-missile shooting and magic missiles

Round 1: Most likely, Golthar has surprise and starts at the far southeast end of one of the corridors. As the player characters are likely to be 4th level or below, they will be affected by sleep, and on average this will KO two 4th level or three 3rd level characters, no saving throw. If he's lucky, the whole party might go down! As stated, he also activates the statues to attack any characters left standing.

Round 2: Golthar moves to another eyehole - in general, he will want to decrease the distance between himself and the stairs. He uses his other level 1 spell, magic missile, to hit the weakest-looking foe, magic-users by preference.

Round 3: Any elves or other still-awake targets left, Golthar moves again and will try his luck with hold person.

Round 4: He is out of spells, so as written, he will make an escape upstairs.

As you can see, this is a brutal sequence that heavily stacks combat in favor of the jade statues and can lead easily to a total kill (or capture) of a party of five or fewer characters who've already been through some tough combats in Xitaqa. Capture is not the end of the road, though. The evil warlock (a 6th level magic-user, to use the Expert D&D title)  would simply kill Stephan to show he means business, and trade the remaining heroes of Sukiskyn for the fateful tapestry he seeks.

What recourse does the party have in this art gallery turned shooting gallery? I recommend allowing characters to cover a single painting with a readied melee attack, or all the paintings in their front field of vision with a missile or ranged spell, to hit Golthar as a held action when he starts chanting from behind the canvas. This will be at -4 to hit in Basic, or at disadvantage in 5th edition, but a hit in Basic will at least disrupt the spell, and in 5th will have a chance to disrupt any concentration spell he has up.

In 5th edition, the three conversion guides I've seen vary in their interpretation of Golthar. Based on other adaptations from that series I've seen, Jay Murphy's Classic Modules Today version is likely to be minimal and rely on minimally reskinned standard 5e creatures, so I didn't inspect it further; P. Daniel Johnson's Iconic Encounters adaptation, which I arrived at late, thoughtfully tackles the known issues with the module with copious notes and advice, and sticks close to Golthar's original spellbook; the Vaults of Pandius adaptation credited only to "G. M." is also minimal, but more creative than Classic Modules, and features a much stronger Golthar. What the Golthars have in common is a combination of control and damage spells, which can be applied in the same way as the Basic strategy I've listed above. In 5th edition, Golthar can shoot damage cantrips as long as he likes, so the encounter becomes more pressing. Still, he will likely lose nerve once he takes substantial damage in the face from a held missile.

The next encounter takes place in the next-up and final floor, X12, Golthar's bedchamber. As written, it's less of an encounter than a scene, and a pulp-serial cliché at that. In too much of a hurry to pick up the enormous amount of treasure and significant objects locked in his personal footlocker, Golthar, ever the drama queen, blows out one of the walls with high explosive. He then uses fly to escape, and covering his tracks, casts mirror image to create two additional flying Golthars. All this is set up to happen in a single round just as the first party members come charging up the stairs. 


Figures painted (mostly) by me; map by Elvis Spadoni

The module as written does consider what happens if the party kills Golthar (umm, yeah, an identical evil mastermind takes over in further encounters). But it's mute on what happens if he is given too much time to get away. It strains belief that the avaricious bastard will not salvage his most precious items, including the golden needle and thread that might show the way to an even larger treasure, if given three or four rounds unthreatened. The party might be slow to find the secret door, they might be slow to regroup, or some of the hobgoblins or Iron Ring goons might still be around to block the stairs. If Golthar gets away with the magic needle, there is no way to deduce the location of the lost Hutaakan city from the Sukiskyn tapestry, and no further adventure beyond selling off the white horses at last.

Maybe ... hear me out ... that's not such a bad thing? After the white herd is sold off, the adventure's next act becomes less compelling, as we will see. The players' time might be better occupied chasing some other lead, including the mini-adventures to the east that didn't fit the relentless pace of the planned events up until now.

Or ... hear me out ... Golthar intends to leave the needle in the chest.  He realizes it is easier for the party to put two and two together, than for him to lay hands on the tapestry. The Iron Ring has many eyes, after all, and the heroes will find it hard to keep their destination a secret ... But, let's not get too far ahead.

The description of the bedchamber, by the way, is really great, showing Golthar's twisted character through a set of furnishings in subtle bad taste. Our man leaves a huge treasure, over 10,000 gold coins as well as some more portable items. The coins will take 10 bearers to shift even at half speed, under Basic D&D encumbrance rules. 5th edition players have less weight to deal with but will still probably travel at less than ideal speed. Also, there's a (fabric?) scroll of the ancient Hutaakans that, if deciphered, will give a little more of an idea what Golthar is after.

So, exit the villain, one way or another. There's still a whole goblin village to get past, and possibly some Iron Ring underlings returning to the site on horseback. But assuming our heroes get back to Sukiskyn, and even if they find the secret map hidden in the tapestry, the next order of business is also plain: that herd of white horses, at long last, is going to market.

Next: On the road to Rifllian

Friday, 29 March 2024

Night's Dark Terror 11: Xitaqa 2, Tower Base

This is part of a series of posts with a scene-by-scene critique, appreciation, and improvement of the 1986 TSR module B10, Night's Dark Terror

Once through the goblins and apes, our adventurers approach the windowless tower of Golthar through one of four entrances to the buildings at its base. Two are unwatched and lead to areas infested with independent monsters. Two are at the front and watched by hobgoblin guards, one leading to Vlack's room and one to a monster area. But first, a little additional background of lore that I spun up to make more sense of the Hutaakan ruins.

At the time of their civilization's fall, the Hutaakans had been developing two themes of arcane lore. One, as mentioned previously, is the lore of creating permanent illusions of concealment and invisibility -- which explains why Xitaqa, and maybe other sites further on, are so hard to find. 

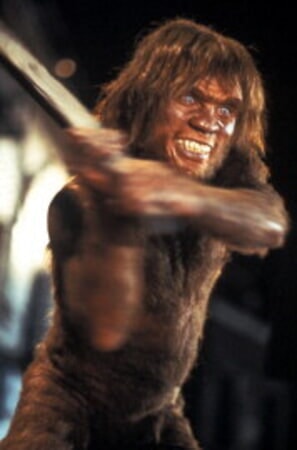
The other thread of investigation concerned the use of sensory deprivation and hallucinogens to regress organisms down the evolutionary tree, the same wacky idea explored in the 1980 film Altered States. This degeneration explains why baboons - basically dog-faced apes -- still hang on to the ruins, for they are the devolved descendants of the jackal-headed civilization. It will also explain some of the things encountered later on in the adventure.

WarnerBros.com | Altered States | Movies
The caveman is not his final form. Still from WarnerBros.com.

With this in mind, we can consider the two abandoned, monster-bearing rooms first. 

The library is covered in thick webs, the customary tip-off that giant spiders are here. Once they're defeated, things can get more interesting, if you're magically able to read ancient Hutaakan ...

As a library of a lost ancient civilization, it's kind of an anticlimax to have the scrolls be all about civil records. My further elaboration was to make the Hutaakan method of writing be stitches in a supple and long-lasting fabric, of which the tapestry map is only one example. These fabric scrolls are mostly dull records, but among them, perhaps in a special or locked section, are scrolls explaining aspects of Hutaakan civilization: the development of illusion and the ascetic reaction against it, as well as disapproving accounts of forbidden experiments with sensory deprivation and certain mushrooms and berries that resulted in partial devolution to ape-form and then a "final degeneration to primordial plasm." To go with the scrolls' material, the writing set treasure object can be a sewing set instead, with silver needles and the different colored threads that showed different phrases and sentences.

Even madder is a scroll stitched up so it cannot be opened without cutting the black thread. Treated as forbidden knowledge, this work is a flight of unbridled madness inspired by the revelations of the isolation tanks. It claims the revelations that the primal Hutaakans were nothing less than the original creators and gods of the universe, who spun from their plasm all creatures and all possibilities. The proof of this is to be found in a loose, to be sure, reading of the nature of the four principal demon lords. All are actually devolved Hutaakan gods - Yeenoghu lowering himself into the form of the primitive gnoll; Demogorgon mutating more strangely into conjoined baboons; Orcus taking the face of an even lower creature and the aspect of a decaying corpse; and Juiblex as the final degeneration. It's wrong (maybe?) and leads nowhere, but it's a fun Easter egg.

Another back way is through the crypt, where in the adventure as written lurk two gelatinous cubes, somehow, that frightened off Golthar after he grabbed the.golden needle and thread (see p. 5) that are key to revelaing the secret map in the Sukiskyn tapestry. If we simply reshape the cubes into near-transparent humps of protoplasm, they fit the Altered States narrative perfectly. Also, some of the niches can have the shattered copper walls of the immersion tanks, old splashes of dried saline solution, and the brittle bones of ancient Hutaakans at various stages of degeneration into baboon form and beyond.

While bursting through one of the doors from the abandoned area into X8 will likely catch Vlack and his crew off-guard, they are fully prepared for approaches through the front door, X4-5. Getting caught in the crossfire of two ice wolf breaths is no joke, even for 5th edition parties, and it's likely that an alerted Vlack will send a minion upstairs to warn Golthar of the invasion - or even flee there himself if his morale flags. The architecture here has more Hutaakan statues, as well as mosaic work that I described as oddly similar to the patterns in the Sukisyn tapestry. 

One more detail: Vlack's sword. Instead of just a boring +1, I gave the red garnet on the sword an extra ability: if it kills a sentient enemy by decapitation in open combat, it gains an additional +1 bonus for the rest of the day. There is a 1 in 6 chance that any kill will naturally be a headshot, or the shot can be called at a penalty (disadvantage, or -4, perhaps).

Wednesday, 13 March 2024

Night's Dark Terror 9: Following the Clues

 This is part of a series of posts with a scene-by-scene critique, appreciation, and improvement of the 1986 TSR module B10, Night's Dark Terror

After the Wolfskull lair, it would be nice to bump around the wilderness a little, maybe see what's left of the other goblin tribes in their lairs or come across some other adventure sites. But Stefan Sukiskyn is in enemy hands and the urgent mission to rescue him has hit a snag - nobody knows where this Xitaqa place is!

There is a truly funny moment as the elders recall the oddly specific ritual that can summon the all-knowing were-horse (chevall) Loshad. The ritual's probably bogus in its precise details, but will summon him all the same. It's here that Loshad's centaur form is revealed, and the party sent on yet another point-to-point mission. Loshad also asks the party to free their horses, presumably their personal horses and not the white herd that is the whole point of the adventure. Although the latter interpretation would make a harsh and compelling dilemma, it would also derail much of the adventure to come.

It should be clear by now that Loshad cares very much about horses. He will talk to the party's steeds in their own language and get some idea of their treatment. They don't mind being asked to gallop over open terrain for an hour a day as Fifth Edition allows them, but they will complain about forced-march conditions, or being exposed to danger in combat. This combination in an NPC --  helpful, but has his own agenda -- is great. It sets up the adventure for some conflict beyond simple good guy-bad guy opposition.

Speaking of bad guys, Loshad's other demand is to go kill a pair of werewolves who live in the hills to the east. We can answer the question "why doesn't the questgiver carry out the quest himself?" implicitly. Loshad by himself is not a match for the two other were-creatures and their wolf pack. While he commands many horses, it's in character for him not to want to endanger their lives when expendable two-leggers are available. He even gives helpful tactical information about the best time to attack.

So it's up the Volaga River into a landscape of hilly bluffs, and a lair that's a well-designed layout stocked with interesting clues and goods. Here, too, we meet the first archaeological evidence of the ancient Hutaakans, the statue of a robed jackal-headed humanoid perched overlooking the cave complex. This feature foreshadows what's to come in the adventure. It had my imagination on overdrive, filling in an extended idea of what the Hutaakan civilization was about. 

Photo source: Plakas Auctions, London

Hear me out on these completely unofficial plot-hacks:

  • The cave complex is an ancient Hutaakan meditation site. The civilization had a phase where they were obsessed with the magic of illusion and concealment, and in reaction, a monastic movement arose that sought to find the truth through introspection. The caves, then, were used for meditation; you may want to have the faint traces of contemplative mandalas painted on the far wall of each of them.
  • This jackal-headed Hutaakan statue has been mistaken for a wolf-man idol, both by Loshad who mentions it as a landmark in his directions, and by the werewolves; blood stains on the ground show that they have sacrificed before it.
  • This is more of an invention, but I found it both implausible and a cliche that the eyes of the statue were gems. I went with an only slightly less shopworn idea: the gem eyes had been taken out and were in the werewolves' treasure, and if they were replaced in the sockets, the statue would plant a powerful, one-use word in the mind of the replacer that could let them see through any illusion or invisibility for a minute. This will definitely be useful in the next scene of the adventure.

The fight with the werewolves has great atmosphere, with many reminders of their enmity to horses reinforcing the adventure's themes. When it's over, Loshad gives up the location of Xitaqa, and takes a rain check on the freeing of the horses. The only problem, realism-wise, is that Xitaqa is very nearby, a ruin with a tall tower that would have been seen by the party if they approached the werewolf lair by the south bank of the Volaga river. 

I solved this problem by having the tower lie under an ancient Hutaakan spell of illusion, or more accurately misidentification -- it looks like a natural rock formation until you look at it with the idea it might be part of a ruin. Loshad saw through the illusion a long time ago, and can point out the "rock" to the party, or they can use the word of power (wastefully) to see it themselves.

Once again, there's little time to prepare or mess around with side adventures. The situation demands immediate action. It's likely that, unless they really need to rest up, the adventurers will go directly from the werewolf fight to the next big site.

Next: The ruins of Xitaqa

Monday, 19 February 2024

Night's Dark Terror 6: Search for the Herd

This is part of a series of posts with a scene-by-scene critique, appreciation, and improvement of the 1986 TSR module B10, Night's Dark Terror

We'll assume the party takes the bait, and sets off on the trail of the stolen herd not long after the siege of Sukiskyn. They are going to be led by the family's heir, Taras, who knows something of the immediate surroundings of his homestead.

Regardless, the trail of a herd of 41 horses should be plainly visible. It leads through the woods due east along the familiar trail to the herd's usual pasture on the moor, then continues along the north edge of the forest. Reconstructing the doings of the night before, the Vipers, on foot and driving the herd, had a full eleven or twelve hours' head start on the mounted Wolfskull riders. In Basic, wolves outpace goblins by a 5:3 ratio, and even in Fifth Edition where travel times are flattened by the rules as written, adopting travel rates more proportional to tactical move makes the following events more plausible.

The Vipers drive the white herd all night and find shelter from the distasteful sun rays under the eaves of the forest, 12 miles east of Sukiskyn. This is less distance than they could travel in a night, but we can assume that the herd caused trouble for them, even assuming they had some kind of animal-handler  to make their whole kidnap feasible. Meanwhile, the thirteen mounted Wolfskulls (minus casualties taken in the siege), including the king and bodyguards, take only a few hours to catch up. Then at map location W2, the massacre happens.

Hans Baldung Grien, 1534

When the party arrives, they will have some giant insect scavengers to deal with. For among the dead Vipers lie seventeen bodies of Sukiskyn's white horses, presumably mauled and part-eaten by wolves. In any system, a dire wolf is going to have about 5 times the hit points of a goblin, and that plus surprise equals a massacre. The most likely tale to be had, if survivors speak, is one of hubris bitterly cursed. Jagga, the dead king, really did think the other two tribes would stick around and complete the siege, so fiercely did they boast of war. He thought his tribe would not be pursued as they made off with the herd.

With this tragic scene, B10 swings the heartbreak hammer again - if the sight of so many dead horses doesn't move a player, think of the lost earnings they represent! But the larger part of the herd has survived and they are easily enough tracked to the next location.

The goblins sold the horses to a bandit camp deeper in the woods, just a small operation with elven thief "Miss L. Fyodorll" and a few of her goons. The adventure as written presents a moral quandary - Fyodorll will swear it was none of her business, that if Sukiskyn wants justice they should get the sale price back from the Viper goblins. She also should know vaguely that they and the Wolfskulls live to the east, setting up the next phase of the adventure.

But the module as written completely ruins the situation. A standoff is likely, with Fyodorll denying all moral claims on stolen property and Taras unwilling to pay for what is rightly his family's. Unless the party pays or negotiates a settlement, the situation is resolved cheaply by Fydoorll inexplicably attacking the party as they leave - shades of "Greedo shot first" to make it clear who the bad guys are.

Here's a better way. It starts from realizing that the Fyodorll gang is not really primarily in the business of selling horses - what customers would visit a stable in the middle of a goblin-infested forest, and where are the acres of pasture that such a large collection would need? The sign claiming to be a horse dealership, then, is a recent bit of wry humor on Miss L. (Lenorre, in my campaign) Fyodorll's part. The white herd is a white elephant for her. With no long-term way to feed them, she will be looking to sell fast - the inflated mark-up cited in the adventure is only a starting point, and any profit is acceptable to her. 

If there is no deal, she might even show up at Sukiskyn later with the herd in tow. Pyotr will be a more pragmatic bargainer than his honor-bound son, possibly offering the pile of goblin weapons and armor, otherwise unsaleable, as something Fyodorll already has a market for. This course of events is even more likely in my campaign, where the elf teasingly hinted about a "history" with Taras' father.

But if the bandit camp must involve a fight, and the players are reluctant to be the aggressors, let it be Taras who provokes it. He'll shoot an arrow in anger from the back, letting the party deal with the consequences, and putting dramatic strain on their otherwise cozy relations with the host family. The bandits won't fight to the death; in my campaign, Fyodorll escaped to further bedevil the party on a memorable foggy day, while one defeated bandit begged for mercy and was taken on as a liege of the Sukiskyn household. They have very little money described on their persons, and it makes sense that their main treasure would be buried, undiscoverable, in the woods nearby.

Regardless, if the party and Taras return empty-handed Pyotr will pull for recovery of the surviving 24 horses, by whatever means necessary. And by then the next quest will have been served up - word reaches Sukiskyn that Stephan has been kidnapped by wolf-riding goblins!

Next: Hexcrawling in search of Stephan Sukiskyn

Saturday, 27 January 2024

Night's Dark Terror 3: Misha's Ferry


This is part of a series of posts with a scene-by-scene critique, appreciation, and improvement of the 1986 TSR module B10, Night's Dark Terror

There's no downside in adopting the rules-as-written travel rates and having two or three days pass between the river ambush and the next encounter at Misha's Ferry. The upside is that it gives the party more time to rest and recover, which in B/X D&D is necessary given the absolutely punishing hit point recovery rules that were somehow left out of the rulebook but are spelled out in this module, on pull-out sheet 1. For each day spent resting you get ... one hit point back. Practically, this elevates the cleric to a must-have class in the party, with their ability to throw out a still-miserly one or two Cure spells a day (but none at first level!) 

Rules-as-written, this is another reason why this module may be too hard for 2nd level Basic D&D characters - the players are soon to be thrown into a gauntlet of encounter after tough encounter without the luxury of several days to rest up fully in between them. You may want to adopt my 52 Pages house rule that characters gain 1 hit point per level from a night's rest, and add that they gain a similar amount from resting all day. Fifth edition, of course, is a more forgiving game, and the encounters as written are much more survivable for a 2nd or 3rd level party in that system.

When the boat reaches the ferry, the emotional and moral depth of the module starts to show. Players who arrived here through the Mentzer Basic set will have already dealt with tragedy in the example game as they see the beloved Aleena fall to evil Bargle. Even though the Basic D&D family had a reputation as being for kiddies, by the mid-80's it joined the Dragonlance trend to present plotted stories that engaged players' feelings, of which B10 is a very good example. No, the 80's did not shy away from heartbreak in fantasy for the sake of the children! Now we're about to get to the tragic streak that runs through the first third of Night's Dark Terror.

Kalanos drops you off at the ferry and gives you directions to make your way inland to Sukiskyn, Stefan's homestead. If they've been helping to row, your party members might be crucial to the boat's progress against the current. But it's also not the end of the world if Kalanos gets to Ilyakana, only nine miles upriver, a little late. The ferry lies on a trade route, and Misha the druid is not around to operate it ("probably just off hunting!" says Kalanos). So, you can also have some vagabonds waiting at the north side of the ferry who will take a short-term rowing job, or even some replacement PC's, as I mentioned last time. And, as we're not necessarily following the same schedule that puts this event at "late afternoon," Kalanos would logically park the boat at the ferry if it's sunset or after dark when they get there.

As might be expected, all is not well with Misha. Her cottage is empty and her pet bear, which Kalanos mentioned, comes roaring out of the woods, maddened and bleeding (from the neck, given the source of the wounds). The plot, which you're invited to telegraph heavily to the players, says that the bear is too scary to fight, so the party holes up in Misha's cottage until it goes away. In 5th edition, a plain old CR 1 brown bear isn't hard for 3rd level characters to fight. A DM might up-scale it to a CR2 cave bear or even a CR3 owlbear. But in Basic, the bear with its hug attack is dangerous as hell, especially against a lightly armored foe. When I ran the first few scenes of B10 using my 52 Pages Basic-like rules, Kalanos (who had chosen to camp overnight at the ferry) high-rolled morale, ran at the bear, and immediately got mauled and death-hugged, 5th level be damned.

No worries, though. If you manage to kill the bear, that's just more fuel for the tragedy once you figure out that it was rage-grieving the death of Misha. Indeed, this is the first of several instances in the adventure where the impact of war and violence is shown through the trauma of a third party, contributing to the gritty feel and raising the stakes in the action. You might also find the dead Misha if you search the river bank. Why you didn't have a chance to see the body coming up the river is unclear, but I just relocated the scene of the tragedy to a berry bush inland (and for 5th edition, added a few goodberries in a pouch to reward the party for finding her). Drained of blood, with bites on her neck, there's a good chance your players will think "vampire" instead of the real culprit, "vampire bats" working for the enemy. Anyone for a darkly comic bear hunt with stakes and garlic at the ready?

I recommend letting players know that they get a few XP, no more than 100 among the party, for burying Misha and any other dead people who are found without hope of burial. This reinforces the theme that the players represent decency and civilization. In fact, the ferry episode introduces a moral urgency to the adventure. The players are not just charging into a condominium of sentient abhumans, licensed to murder and loot, as they were expected to in the first of the B series, Keep on the Borderlands. It's 1986, and they've found the quickest way to establish a heroic narrative: show victimized people. If your ethics run that way, a DM might bend the narrative to involve misunderstood humanoids manipulated by an evil human slaver conspiracy. Or not. The point is, you the players are just on the way to do some business, and trouble has come to you and your hosts. But you're well equipped and eager to fight back - hell, it might even make you stronger in the doing.

Some of this module's much-derided railroading comes through after this encounter. For the story to play as written, the players need to leave the cottage next morning and take the whole day getting to Sukiskyn. Authorial fiat descends like a ton of bricks: the DM is told to use any means necessary to get the players to stay in the cottage overnight. Scary wolves howl in the night, and attack if the players press on to Sukiskyn -- though 5th edition characters will not be scared of 2-5 big bad wolves. What's more, the DM has permission to get the players lost in the woods, Blair Witch style -- even though there's a trail and a waxing moon shining through light clouds, by the adventure's own meticulous almanac. And then, when they set out the next day, the DM has the power to stretch or squeeze the path to fit the party's movement rate, making sure they get to Sukiskyn at sundown so the big set-piece there can go exactly as planned.

I'll have more to say about this next post, but, is it such a terrible crime if the players get to their destination a bit early or a bit late? Let's look at the trail. As mapped, it winds across six hexes, 18 miles to Sukiskyn. 


If the heroes get there early, it's because they've braved the perils of the night journey, or risked lighter armor in exchange for faster travel, or somehow learned that it's a bit quicker to follow the main river and turn at the stream. So why not reward early-comers with a safer set-up for the big battle that's ahead? If they get there late, things can also be arranged so they don't miss everything, but they have it a bit harder. In Mentzer D&D, the sluggish travel rates of the Cook edition get more realistic. Those in no or leather armor move 24 miles a day, those in metal armor move 18. So an average party will get there in time, the lighter-equipped party is rewarded by getting there a few hours before sunset, and any slower movement has to be chalked up to dawdling or encumbrance beyond fighting kit.

Nor is there any need to bend the rules to frustrate the night journey.  Just throw some heavy cloud cover over the skies, warn them that openly carried light will attract attention. Warn them, too, that they will get tired near dawn. Perhaps that fatigue involves minor hit point damage, an exhaustion level in 5th Edition, or some minuses to attack. If they insist on going by night, throw in guaranteed encounters with a hungry wolf pack tailored to the party's abilities, and with an advance party of goblin scouts, representing the ambush that starts off the next episode.

There are 46 pages of adventure, and we're on page 2; dozens of encounters, and we're at the third one. But here is where Night's Dark Terror puts on its big show; here we are, at the siege of Sukiskyn!