
After a long hiatus, during which my role-playing table defeated all that A2 had to offer, I probably should wrap up with a critical review of the dungeon part of the module.
Like the fort level, the dungeon is built around two "railroad" sequences of rooms which are shaded on the TSR map. Each is similar in structure, leading the players at first through a sequence of traps, trick ambush fights, and difficult problem environments. Each sequence culminates in a boss-group fight that (like the climax of the fort level) is laid out tactically for the GM in a then-innovative detail map showing the location of each foe and furnishing.
Also like the fort level, these tricks and traps are for the most part shamelessly silly. This is D&D funhouse material with no care for naturalism. There's a magnet trap in the wall, punishing plate mail and capturing blades while hobgoblins run out and hit you with wooden clubs. There's a gauntlet of oily grille-bars through which a colony of boggles, the dimension-hopping menaces used as hound dogs in the fort, will stab and pickpocket you. There's a cave that can only be traversed by finding the sawn-off tops of stalagmites that cross an abyss filled with obscuring and sometimes scalding steam. There's a room with beehives, but no flowers; a room for cheesemaking, with nothing remotely milkable.
Indeed, if the module's dungeon were laid out just with the two railroads connected end-to-start, the whole ordeal would be a ridiculous way for the bad guys to run their operations - tortuous, snaky, running visitors and reinforcements through deadly steam, giant spiders, and bees. But in the first improvement over the fort level, the published edition of the dungeon adds sensible secret passages that both make more sense of its layout and allow more discovery and choices in play. There's a secret shortcut around the boggle grille that can be deduced by watch the scary but harmless ghost of an elf act out its last actions on Oerth. There's another that allows bypassing the steam and bee perils, leading from the first boss fight to the newly developed back area of the second boss fight -- an area that itself is laid out in a branching, not railroad, way.
Some of the other trickery works remarkably well in play. The boggles in their grille-gauntlet get to use their limb-phasing ability for good effect, not wasted as it is in the fort level. I played it like this: for each 5 x 5' wall, floor or ceiling surface a player is exposed to, they have a 1 in 6 chance of being spotted by a boggle (and can then attack its face, if they are watching and ready in that direction), once spotted, they have a similar chance of coming under attack from each surface they're close to, with an even chance of being stabbed or pickpocketed. I was able to drive the players to some truly wild levels of spell-based problem solving to get the more vulnerable members across. One even had a prized weapon stolen from him, which in the bounce-back world of 5th edition stings much more than 10 or 20 hit points damage would. The hives and their honey-bucket trap, as silly as they are, also lead into creative solutions (5th edition makes it easy to talk to the bees and that's the way my nature-loving players went.)
The end-of-railroad fights, like the one in the fort level, show off principles of a good tactical challenge that would become codified in advice to Dungeon Masters over the coming decades - variety of opponents, terrain features and obstacles (stairs, balconies, tables), and weaponized hazards (falling chandeliers, brine vats, caged monsters). By the early 80's it could no longer be taken for granted that DMs had a devious wargamer mind, so each fight comes with a detailed playbook of the foes' positioning, moves, and spells. These instructions may have been created out of a wish to standardize the running of the combat in tournament situations, but they also came to serve as examples for DMs who wanted to write and run their own memorable combats at home.
In the fort level, many of the added areas beyond the tournament gauntlet seem like dead ends or afterthoughts. In the dungeon, the added areas are much better done. They include the living quarters and operations of a varied group of slavers, led by Markessa, the boss of the final fight. As in the preceding module, there is an area of cages, as well as living quarters for the slaver NPCs. In full realism mode they include a kitchen, mess hall, and latrine.
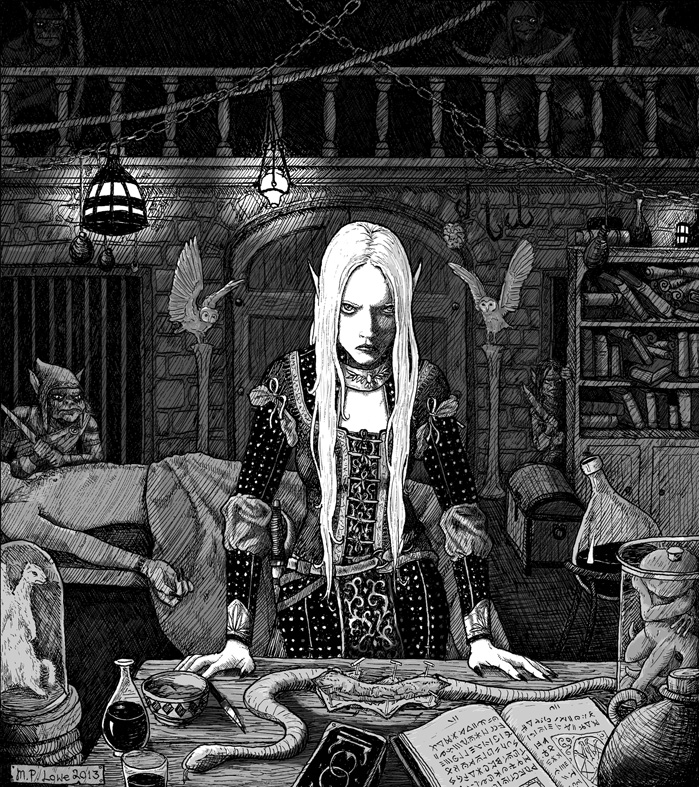
We also find the lair of Markessa and areas supporting her operations. This evil elf is already memorable as a mad scientist -- she is responsible for many of the mutant creatures in the dungeon, and the fight takes place in her lab. Her home area has the details that establish her as one of the best villains in the TSR modules. There's a cloned body double, a surgically enhanced perfect lover and bodyguard, plenty of secrets and tricks, and a whole cave complex full of mutant humanoids, the cavelings, who worship her as a goddess.

The caveling area is the most underdone part of all this. The map places their caves in a tightly arranged 100' square, but the description of their environment deserves a more sprawling, abstracted or procedurally generated maze of tunnels to live in. The cavelings also are meant to fuel the unruly-stronghold dynamic. Not only are they subject to various mental derangements, but they steal and eat slaves from the cells from time to time (how exactly?), and they explicitly can be turned against the slavers and even their creator Markessa. How the rabble-rousing is supposed to happen, when to get to the caveling area you will have to fight through both the slavers and, probably, Markessa, is not clear. Still, the intention is there.
 |
| When you run out of space in the corner of the graph paper |
A better unruly element is the gang of slavers nominally allied with Markessa, whose leader, Blackthorn, is an ogre mage who affects a creepy-barely-human shape. Like his name-alike in James Clavell's Shogun (Japanese ogre, get it?), Blackthorn is ambitious and might work with the party to betray Markessa. In his barracks are some werewolves and a group of slavers who mostly embody the banality of evil - an architect, an accountant, an alchemist, all keeping the wicked operation running.
Blackthorn is a more credible early encounter, as his area can be reached through one of the secret passages early on. But Markessa has a way of spying on him -- a telepathic potted plant with hidden mutant eyes and ears which, although absurd, is memorable and perfectly in character for the mad scientist.
Overall, the dungeon level presents a fun challenge marred by implausible excess and less-than fluent strategic design. I have to also mention the obvious repetition of elements from the fort level. This is understandable if the level was designed to be run in parallel, but it creates jeopardy if the whole place is run as one adventure. These repeats include:
- Were-creature henchmen (boars above, wolves below)
- A kitchen with a grumpy cook
- A trap with a rolling danger (bear on wheels, pile of logs) and a pit behind
- A slave gone insane (escaped in the fort, caged in the dungeon)
- An apparition tied to the trauma of its death - represented by two different monster types, the haunt and the less dangerous phantom, both intended to be less difficult than the official high-level Ghost monster.
- An NPC found sitting behind a desk, who pretends to chat with the PC's in good faith for a while, then flips the desk and attacks
As well, there's material that repeats well-known beats from other TSR modules of the era. There's a wholly gratuitous delegation of drow and a tunnel leading down to the underdepths. Obviously, this calls back to the culmination of the Giants series, but tends to undermine Markessa as the most evil elf-type around. The masquerading ogre mage is maybe just a good use of the monster type but recalls a similar climax at the end of one of the railroads in White Plume Mountain.
As a whole, A2 is a more ambitious, unbalanced, and overstuffed experience than A1. The unruly elements don't quite rule out the danger of a total party kill on the fort level, while the dungeon level is both less railroaded and less amenable to a complete mobilization of the defenders. The creative and naturalistic challenges of A1 take a turn for the worse, into absurdist funhouse territory. Markessa is a much better final boss than the underwhelming Sturm Bluchholtz of A1 (who's not even named in the first printing). As proof of her appeal, in the Slavers sequel module from 2000, the idea of a self-obsessed villain who creates a line of clone henchwomen led to some righteous excess, with different color-coded Markessas roaming the Flanaess.
The Stockade can be said to outdo the Undercity, but that's not always a good thing. In any event, we are past the high-water mark of the series now, as we prepare for the least worthwhile module of the quartet, A3 - Assault on the Eyrie of the Slave Lords.


No comments:
Post a Comment